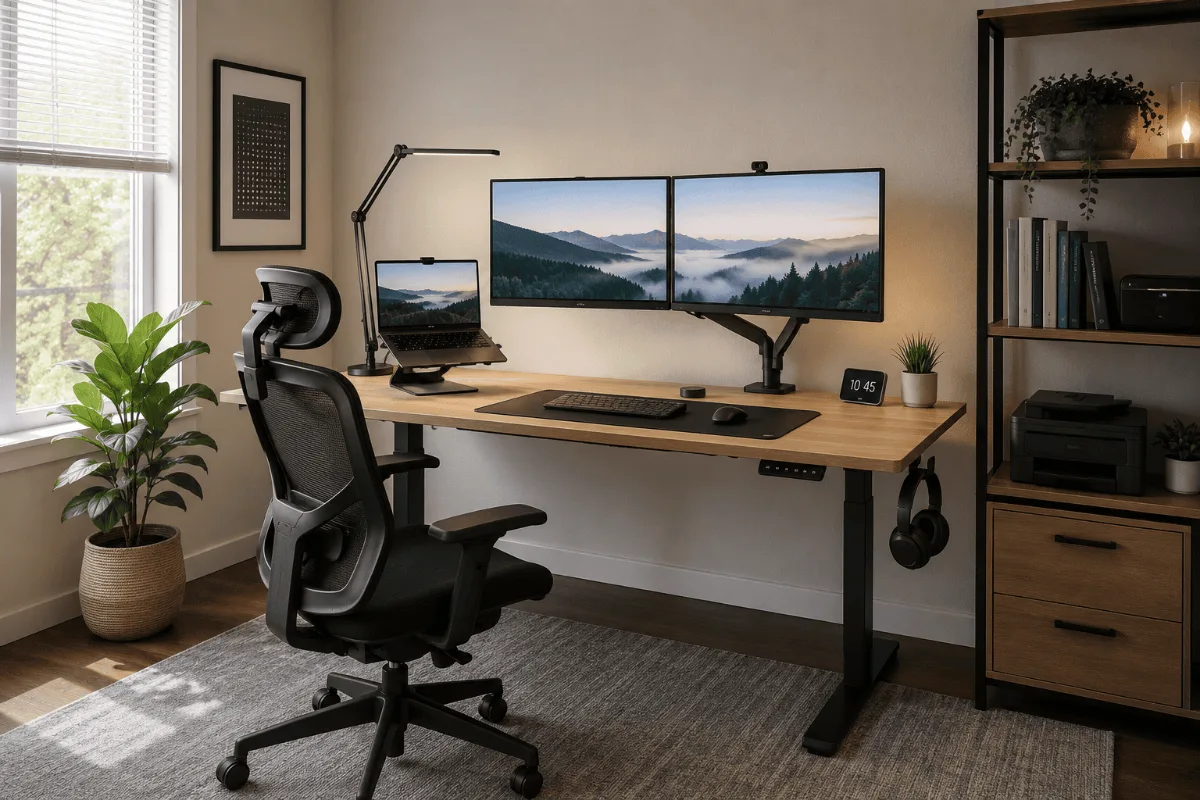
Almost every ergonomic home office setup guide gives you the same list: monitor at eye level, elbows at ninety degrees, feet flat on the floor. All of it correct. All of it nearly useless as written, because it describes a destination and says nothing about the route.
The route matters more than the list. Adjust these things in the wrong order and every change undoes the one before it — raise the screen, then raise the chair, and now the screen is wrong again. There is one sequence that converges, and it starts from a part of your body most guides never mention.
The order everything else depends on
Chair → work surface → screen → keyboard and mouse → the room. → Each step is set relative to the one before it. Skip ahead and you will be back at step one within a week, which is exactly why most people’s “ergonomic setup” quietly drifts back to where it started.
Start from your elbows, not your desk
Here is the reframe that makes the rest of this work. Your desk height is a fixed number that came from a factory. Your elbow height is the number that actually decides whether your shoulders spend the day creeping toward your ears.
So the setup does not begin by measuring the desk. It begins by sitting down properly and finding out where your elbows land — then making everything else agree with that.
Step 1: the chair, set from the floor up
Adjust the seat height first, and use your feet as the reference rather than the desk. Mayo Clinic’s guidance is to set the chair so your feet rest flat on the floor with your thighs parallel to it. If you are short enough that flat feet mean a low seat, or tall enough that a comfortable seat leaves your feet dangling, the fix is a footrest — not a compromise on the chair height.
Then the armrests, which is the adjustment people skip. Position them so your arms rest on them with your elbows close to your body and your shoulders relaxed. Armrests set too high push your shoulders up all day; set too low they do nothing at all and you end up bracing on the desk edge instead.
Lumbar support last. A fixed bump in the backrest either happens to land on your lower back or it does not, and there is nothing you can do about it — which is the strongest argument for insisting on depth-adjustable lumbar when you buy. If your current chair has a fixed bump in the wrong place, a rolled towel at belt height is a real fix, not a joke.
Hbada Ergonomic Chair
Height, flip-up arms and a compact footprint to adjust from
→
If your chair has no useful adjustments at all, no amount of sequencing rescues it — the hours question is where to work out whether it is worth replacing, and the chairs under $200 guide covers the entry tier.
Step 2: the work surface, set to your elbows
With the chair right, the desk either fits or it does not, and now you can actually tell.
Two things to check. First, clearance: OSHA asks for 20 to 28 inches of clear space under the work surface for your legs, across at least two seated postures. Measure from the floor to the underside of the desk — not to the top — because a thick top and a deep drawer rail eat that number fast.
Second, height relative to your elbows. Your forearms should come to the surface roughly level, with your hands at or slightly below elbow height. If the desk is too high, raise the chair and add a footrest. If it is too low, raise the desk on stable risers. A height-adjustable desk removes the guesswork entirely, which is most of its ergonomic argument — the sit-stand part is a bonus.
Your desk is the wrong height. Which fix applies?
- ✅ Desk too high, chair goes up fine → raise the chair, add a footrest
- ✅ Desk too low, otherwise good → stable risers under the legs
- ✅ Under 20 inches of knee clearance → the desk is the problem, replace it
- ❌ Shared desk, two different bodies → height-adjustable, or you are re-adjusting daily
Fezibo Electric Standing Desk
Sets the surface to your elbows instead of the other way round
→
Step 3: the screen, and this is where the numbers get specific
Screen position is the most measurable part of a workstation and the most commonly wrong. OSHA’s computer workstation guidance gives real numbers rather than vibes:
- Distance: 20 to 40 inches from your eye to the front of the screen. Closer than 20 inches is the most common error.
- Height: the top of the monitor at or slightly below eye level.
- Angle: the centre of the screen 15 to 20 degrees below horizontal eye level.
- Tilt: perpendicular to your line of sight — usually no more than 10 to 20 degrees.
- Left and right: never more than 35 degrees off centre. This is the rule dual-monitor setups break constantly.
One addition worth knowing because almost nobody mentions it: if you wear bifocals, Mayo Clinic recommends dropping the monitor a further 1 to 2 inches, because you are reading through the lower portion of the lens and the default height forces your chin up all day.
A laptop on a desk fails every one of these by a wide margin — the screen sits far below eye level and the distance is usually well under 20 inches. That is a hardware problem, not a posture problem, and no amount of sitting up straight fixes it.
Nulaxy C1 Laptop Stand
Gets a laptop screen up to where OSHA wants it
→
VIVO Dual Monitor Arm
Fine height and depth control a stock stand cannot give you
→
Worth reading alongside: laptop stand vs monitor arm covers which one your desk actually needs, and the neck-pain stand guide goes deeper on the height thresholds that matter.
Step 4: keyboard and mouse, last of the hardware
These come last because their correct position is defined entirely by the three steps above. Mayo Clinic’s rule is simple: put the keyboard directly in front of you so your wrists and forearms are in line and your shoulders stay relaxed, keep your wrists straight, upper arms close to your body, and your hands at or slightly below elbow level.
Two practical consequences that follow from that and get missed:
The mouse belongs at the same height and as close to the keyboard as you can manage. Reaching out and forward for a mouse on the far side of a number pad is a shoulder problem that people usually diagnose as a wrist problem.
A raised laptop needs a separate keyboard, always. Putting the laptop at eye level and then typing on its built-in keyboard puts your hands at screen height, which is worse for your shoulders than the low screen was for your neck. If you raise the screen, the keyboard has to come down and out.
If your wrists are the specific complaint rather than your neck or back, a split or tented board is the adjustment that addresses it — the ergonomic keyboard guide covers who each shape actually helps.
Microsoft Ergonomic Keyboard
The gentle-curve entry point into split layouts
→
Step 5: the room, which quietly undoes everything
You can get all four steps above right and still finish the day with a headache, because the lighting is fighting you.
OSHA’s guidance on glare is to place the monitor perpendicular to the window rather than facing it or backing onto it. A window directly behind the screen makes your eyes fight a bright background all day; a window directly behind you throws reflections onto the panel. Perpendicular avoids both.
The related trap is tilt. Tilting the monitor back to get a better viewing angle is a common instinct, and it aims the screen straight at your ceiling lights — which is why the tilt guidance caps out around 10 to 20 degrees.
The part no adjustment replaces: moving
A perfectly configured workstation held perfectly still for eight hours is still a static posture, and static is the actual problem.
The most usable framework here is the 20-8-2 rule, developed by Alan Hedge, professor of ergonomics at Cornell. Within every 30 minutes: sit for 20, stand for 8, move for 2. The reason it caps standing at eight minutes rather than encouraging more is that standing beyond about 30 minutes at a stretch raises the risk of lower back pain and leg fatigue — standing all day is a different injury, not a solution.
20-8-2, every half hour
Sit 20 · Stand 8 · Move 2 → The two minutes of actual movement are the part people drop, and they are the part that does the most work. Standing still at a raised desk is closer to sitting than it feels.
If you stand on a hard floor, fatigue in your feet and lower back tends to show up after roughly half an hour — which is another argument for the eight-minute cap, and the reason an anti-fatigue mat earns its place for anyone standing regularly.
Topo Comfort Mat by Ergodriven
Contoured rather than flat — the shape that keeps you shifting
→
Buy in this order, and only after adjusting
Do the five steps first with what you already own. Whatever is still wrong after that is the thing worth spending on — and it is rarely what people expect.
| What still hurts after adjusting | The actual cause | What fixes it | Get It |
|---|---|---|---|
| Neck and upper back | Screen too low — usually a laptop on the desk | Laptop stand plus a separate keyboard | Check → |
| Lower back by mid-afternoon | Fixed lumbar bump landing in the wrong place | A chair with depth-adjustable lumbar | Check → |
| Shoulders creeping up | Surface too high for your elbows | Height-adjustable desk, or risers and a footrest | Check → |
| Wrists and forearms | Hands above elbow level, or a mouse too far out | Split or tented keyboard, mouse pulled in close | Check → |
| Screen sits wrong on two monitors | Stock stands cannot hit the 35-degree rule | A monitor arm with real depth adjustment | Check → |
| Feet and legs while standing | Hard floor plus a static stance | A contoured anti-fatigue mat | Check → |
Get the screen to eye level
Of the five steps, screen height is the one most people have most wrong and the one with the clearest standard to hit — 20 to 40 inches away, top at or just below eye level, centre 15 to 20 degrees below horizontal. It is also the cheapest to fix. A stand and a separate keyboard cost a small fraction of a chair and remove the single most common source of neck complaints in a home office. Adjust everything else first, but if you only do one thing this week, do this one.
Frequently Asked Questions
Quick Takeaways
- Order beats checklist. Chair, then surface, then screen, then input, then the room.
- Set the chair from the floor — feet flat, thighs parallel — not from the desk height.
- OSHA: screen 20 to 40 inches away, top at or just below eye level, centre 15 to 20 degrees below horizontal.
- Knee clearance of 20 to 28 inches, measured to the underside of the desk.
- Raising a laptop without adding a keyboard trades a neck problem for a shoulder one.
- Monitor perpendicular to the window, tilt capped at 10 to 20 degrees.
- 20-8-2 every half hour. The two minutes of movement is the part that does the work.
Nulaxy C1 Laptop Stand is where most readers here start, because screen height is the step most setups get wrong. Stock and colour options shift often, so it is worth checking what it is going for right now.